4. Creating the Text Tool
With that in place, we can now create the TextTool class itself. This class is a lot like the RectangleTool
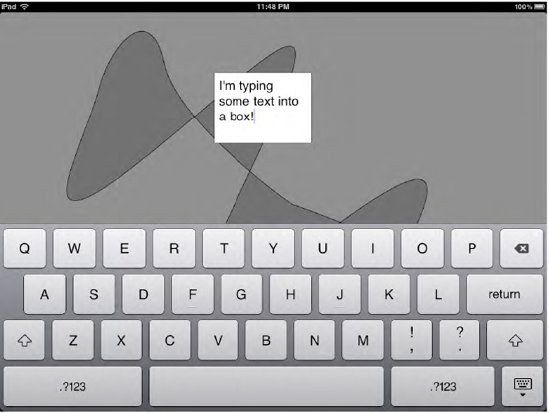
class, but with an extra twist: When the user finishes drawing a
rectangle, this tool switches into text-editing mode by placing a UITextView
at the location where the rectangle was drawn. It's set up as the first
responder so that the keyboard will appear, and users can enter their
text. It also shows a gray shade over the rest of the screen, to give
the users some focus so they can see where they're typing, as shown in Figure 2.
When the user presses the
bottom-right keyboard button to dismiss the keyboard, or taps anywhere
else in the drawing area, the text entry is considered complete. At that
point, the tool creates an instance of a new class called TextDrawingInfo (which we haven't created yet). That will be another class that implements the Drawable protocol , and can therefore be added to the list of things that DudelView needs to draw.
4.1. Declaring the Text Tool Interface
Create a new class called TextTool, and start defining it by putting this code into TextTool.h:
//  TextTool.h
#import <Foundation/Foundation.h>
#import "Tool.h"

@interface TextTool : NSObject <Tool, UITextViewDelegate> {
  id <ToolDelegate> delegate;
  NSMutableArray *trackingTouches;
  NSMutableArray *startPoints;
  UIBezierPath *completedPath;
  CGFloat viewSlideDistance;
}
@property (retain, nonatomic) UIBezierPath *completedPath;
+ (TextTool*)sharedTextTool;
@end
Most of what's declared here is pretty similar to what our other tools had. The one new addition is the viewSlideDistance,
which we'll use to determine how far to shift the view in case it's
being covered up by the on-screen keyboard (more on that in a page or
two).
4.2. Implementing TextTool
The file containing the implementation, TextTool.m, so I'll interject some additional information at the tricky spots as we go through it. Start off with some #imports:
//  TextTool.m

#import "TextTool.h"
#import "TextDrawingInfo.h"

#import "SynthesizeSingleton.h"
After the rectangle is drawn,
we'll create a temporary view, which will need to be cleaned up later.
Instead of using an instance variable for this, we're going to assign a
tag number for later retrieval.
#define SHADE_TAG 10000
Later on, we'll check the
distance between the drawn rectangle's start and end points to see if we
think it's big enough to contain any text. This function will help us
out.
static CGFloat distanceBetween(const CGPoint p1, const CGPoint p2) {
  // Pythagoras in the house!
  return sqrt(pow(p1.x-p2.x, 2) + pow(p1.y-p2.y, 2));
}

@implementation TextTool
@synthesize delegate, completedPath;
SYNTHESIZE_SINGLETON_FOR_CLASS(TextTool);
- init {
  if ((self = [super init])) {
    trackingTouches = [[NSMutableArray array] retain];
    startPoints = [[NSMutableArray array] retain];
  }
  return self;
}
- (void)activate {
}
- (void)deactivate {
  [trackingTouches removeAllObjects];
  [startPoints removeAllObjects];
  self.completedPath = nil;
}
- (void)touchesBegan:(NSSet *)touches withEvent:(UIEvent *)event {
  UIView *touchedView = [delegate viewForUseWithTool:self];
  [touchedView endEditing:YES];
This tool should allow the user to drag out only one rectangle at a
time. If we let it do more, how would we know which one should get the
text? So here, instead of dealing with all the touches, we just ask for
any one of them.
UITouch *touch = [[event allTouches] anyObject];
Remember the touch, and its original start point, for future reference.
[trackingTouches addObject:touch];
  CGPoint location = [touch locationInView:touchedView];
  [startPoints addObject:[NSValue valueWithCGPoint:location]];
}
- (void)touchesCancelled:(NSSet *)touches withEvent:(UIEvent *)event {
}
- (void)touchesEnded:(NSSet *)touches withEvent:(UIEvent *)event {
  UIView *touchedView = [delegate viewForUseWithTool:self];
  for (UITouch *touch in [event allTouches]) {
    NSUInteger touchIndex = [trackingTouches indexOfObject:touch];
We continue with the rest
only if we actually remember the start of this touch. We might be seeing
a simultaneous touch that we ignored earlier.
if (touchIndex != NSNotFound) {
      CGPoint startPoint = [[startPoints objectAtIndex:touchIndex] CGPointValue];
      CGPoint endPoint = [touch locationInView:touchedView];
      [trackingTouches removeObjectAtIndex:touchIndex];
      [startPoints removeObjectAtIndex:touchIndex];
Detect short taps that are too small to contain any text. These are probably accidents.
if (distanceBetween(startPoint, endPoint) < 5.0) return;
Make a rectangle that stretches from the start point to the current point, and wrap that in a path.
CGRect rect = CGRectMake(startPoint.x, startPoint.y,
                               endPoint.x - startPoint.x, endPoint.y - startPoint.y);
      self.completedPath = [UIBezierPath bezierPathWithRect:rect];
Draw a shaded area over the entire view, so that the users can easily see where to focus their attention.
UIView *backgroundShade = [[[UIView alloc] initWithFrame:touchedView.bounds]
                                 autorelease];
      backgroundShade.backgroundColor = [UIColor colorWithWhite:0.0 alpha:0.5];
      backgroundShade.tag = SHADE_TAG;
      backgroundShade.userInteractionEnabled = NO;
      [touchedView addSubview:backgroundShade];
Now comes the fun part. We make a temporary UITextView for the actual text input, and set ourselves up to receive notifications when that input begins and ends.
UITextView *textView = [[[UITextView alloc] initWithFrame:rect] autorelease];
      [[NSNotificationCenter defaultCenter] addObserver:self
                                               selector:@selector(keyboardWillShow:)
                                                   name:UIKeyboardWillShowNotification
                                                 object:nil];
      [[NSNotificationCenter defaultCenter] addObserver:self
                                               selector:@selector(keyboardWillHide:)
                                                   name:UIKeyboardWillHideNotification
                                                 object:nil];
Anyone dealing with text
input on the iPhone has probably had to tackle the problem of displaying
content that may be obscured by the on-screen keyboard. Here in Dudel,
we're going to have the same problem, since users can easily drag a text
rectangle in the lower half of the screen.
The following code
determines how far the main view needs to be shifted to account for the
current rectangle, based on the current orientation and the size of the
on-screen keyboard. This value is stored in the viewSlideDistance
variable. It will be used later when the keyboard slides into place,
and again when it slides back out. Although a user can still create a
text rectangle so tall that it will be partly obscured, by doing the
following, we're at least making a solid effort and covering the most
common cases.
CGFloat keyboardHeight = 0;
      UIInterfaceOrientation orientation =
        ((UIViewController*)delegate).interfaceOrientation;
      if (UIInterfaceOrientationIsPortrait(orientation)) {
        keyboardHeight = 264;
      } else {
        keyboardHeight = 352;
      }
      CGRect viewBounds = touchedView.bounds;
      CGFloat rectMaxY = rect.origin.y + rect.size.height;
      CGFloat availableHeight = viewBounds.size.height - keyboardHeight;
      if (rectMaxY > availableHeight) {
        // calculate a slide distance so that the dragged box is centered vertically
        viewSlideDistance = rectMaxY - availableHeight;
      } else {
viewSlideDistance = 0;
      }

      textView.delegate = self;
      [touchedView addSubview:textView];
This next part is a bit of a trick. Due to a bug in UITextView,
just telling it to become the first responder doesn't actually make it
happen. The users typically must tap it once on their own to make the
keyboard pop up. Toggling the editable flag is a work-around that makes the keyboard actually appear.
textView.editable = NO;
      textView.editable = YES;
      [touchedView becomeFirstResponder];
    }
  }
}
- (void)touchesMoved:(NSSet *)touches withEvent:(UIEvent *)event {
}
- (void)drawTemporary {
  if (self.completedPath) {
    [delegate.strokeColor setStroke];
    [self.completedPath stroke];
  } else {
    UIView *touchedView = [delegate viewForUseWithTool:self];
    for (int i = 0; i<[trackingTouches count]; i++) {
      UITouch *touch = [trackingTouches objectAtIndex:i];
      CGPoint startPoint = [[startPoints objectAtIndex:i] CGPointValue];
      CGPoint endPoint = [touch locationInView:touchedView];
      CGRect rect = CGRectMake(startPoint.x, startPoint.y, endPoint.x - startPoint.x,
                               endPoint.y - startPoint.y);
      UIBezierPath *path = [UIBezierPath bezierPathWithRect:rect];
      [delegate.strokeColor setStroke];
      [path stroke];
    }
  }
}
- (void)dealloc {
  self.completedPath = nil;
  [trackingTouches release];
  [startPoints release];
  self.delegate = nil;
  [super dealloc];
}
These are the methods that
are triggered by the hiding and showing of the keyboard. When the
keyboard slides into place, it covers up the lower portion of the
display. Here, we handle this by shifting things a bit if the rectangle
we're operating on is covered up.
- (void)keyboardWillShow:(NSNotification *)aNotification {
  UIInterfaceOrientation orientation =
    ((UIViewController*)delegate).interfaceOrientation;
  [UIView beginAnimations:@"viewSlideUp" context:NULL];
  UIView *view = [delegate viewForUseWithTool:self];
  CGRect frame = [view frame];
  switch (orientation) {
case UIInterfaceOrientationLandscapeLeft:
      frame.origin.x -= viewSlideDistance;
      break;
    case UIInterfaceOrientationLandscapeRight:
      frame.origin.x += viewSlideDistance;
      break;
    case UIInterfaceOrientationPortrait:
      frame.origin.y -= viewSlideDistance;
      break;
    case UIInterfaceOrientationPortraitUpsideDown:
      frame.origin.y += viewSlideDistance;
      break;
    default:
      break;
  }
  [view setFrame:frame];
  [UIView commitAnimations];
}
- (void)keyboardWillHide:(NSNotification *)aNotification {
  UIInterfaceOrientation orientation =
    ((UIViewController*)delegate).interfaceOrientation;
  [UIView beginAnimations:@"viewSlideDown" context:NULL];
  UIView *view = [delegate viewForUseWithTool:self];
  CGRect frame = [view frame];
  switch (orientation) {
    case UIInterfaceOrientationLandscapeLeft:
      frame.origin.x += viewSlideDistance;
      break;
    case UIInterfaceOrientationLandscapeRight:
      frame.origin.x -= viewSlideDistance;
      break;
    case UIInterfaceOrientationPortrait:
      frame.origin.y += viewSlideDistance;
      break;
    case UIInterfaceOrientationPortraitUpsideDown:
      frame.origin.y -= viewSlideDistance;
      break;
    default:
      break;
  }
  [view setFrame:frame];
  [UIView commitAnimations];
}
This method, declared in the UITextViewDelegate protocol, is called when the user taps outside the textView or dismisses the keyboard. Here, we create the TextDrawingInfo
object (which we'll define shortly) that contains the entered text,
along with the current font and color choices. Then we get rid of the
temporary views we created earlier.
- (void)textViewDidEndEditing:(UITextView *)textView {
  NSLog(@"textViewDidEndEditing");
  TextDrawingInfo *info = [TextDrawingInfo textDrawingInfoWithPath:completedPath
                                                              text:textView.text
                                                       strokeColor:delegate.strokeColor
                                                              font:delegate.font];
  [delegate addDrawable:info];
  self.completedPath = nil;
UIView *superView = [textView superview];
  [[superView viewWithTag:SHADE_TAG] removeFromSuperview];
  [textView resignFirstResponder];
  [textView removeFromSuperview];
  [[NSNotificationCenter defaultCenter] removeObserver:self];
}
@end
So that's the Text tool.
It's fairly complex, but that's actually a good thing! All the
intricacies of entering text are in one place, and the rest of our
architecture requires minimal changes in order to deal with it. You've
already seen the few changes that DudelViewController needed, and the DudelView class itself requires no changes at all! All that's left now is to define the TextDrawingInfo class.